

【教學/基礎】以 VNC 和 Raspberry Pi 連線
Last Updated on 2022 年 7 月 19 日 by 小編
內容目錄
為什麼要使用 VNC?
VNC 是一種使用 RFB 協定的螢幕畫面分享及遠端操作軟體。由於 VNC 與作業系統無關,因此可跨平台使用。如果我們需要和 Pi 做有圖形介面的連線,VNC 是首選。本篇將會介紹如何 以 VNC 和 Raspberry Pi 連線。
VNC 架構
如何安裝 VNC?
這裡簡介如何在 Pi 上安裝設定 VNC 伺服器,並透過個人電腦以 VNC 用戶端連線到 Pi。
1. 在 Pi 上安裝 VNC 伺服器
pi@raspberrypi:~$ sudo apt-get install tightvncserver
2. 在個人電腦安裝 VNC 用戶端
sosorry@ubuntu:~$ sudo apt-get install vncviewer gtkvncviewer
3. 在 Pi 上啟動 vncserver
pi@raspberrypi:~$ vncserver
如果是第一次執行 vncserver 時會問幾個問題,包括登入的密碼和可供其他人流覽的 read-only 密碼,而 read-only 密碼可以不設定。登入的密碼會加密後存在 ~/.vnc/passwd 檔案裡。
You will require a password to access your desktops.

Password:
Verify:
Would you like to enter a view-only password (y/n)? n
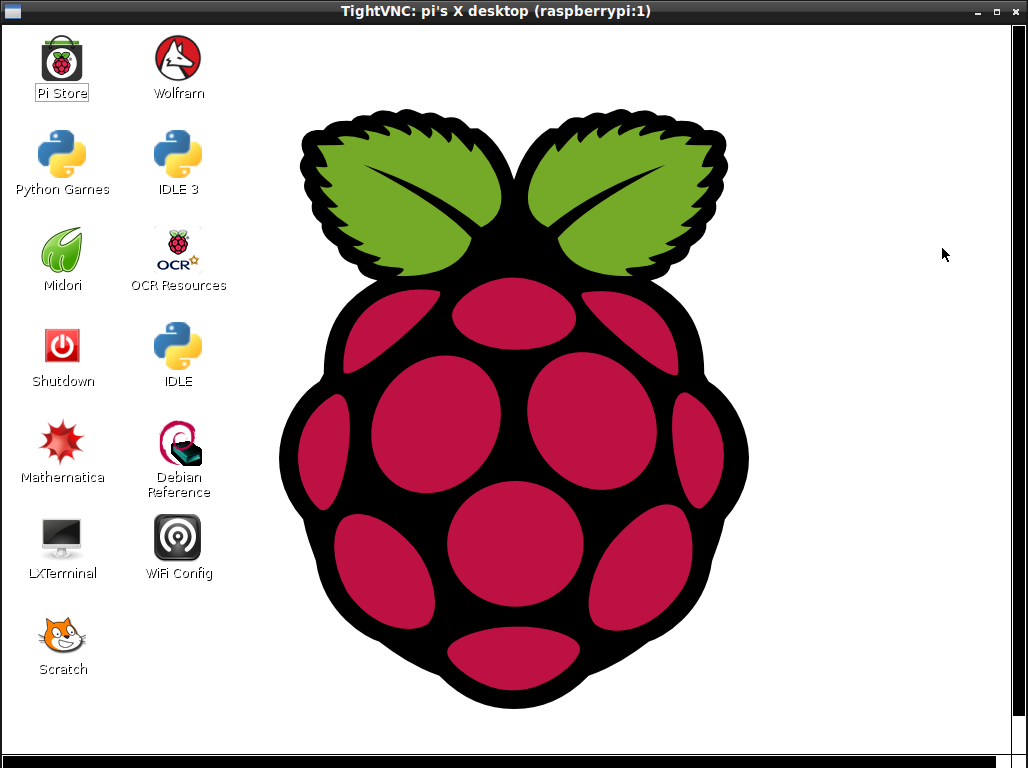
之後我們就可以透過 vncviewer 或是 gtkvncviewer 之類的軟體和 Pi 連線了。假設 Pi 的 IP 為 192.168.1.2。
VNC 設定參數
如果要對 VNC 伺服器做更多設定,常用的參數有:
– 連線埠 (:$NUM):例如設定 :1 開啟的 port 為5901,:2 開啟的 port 為5902,依此類推,預設為 :1。
– 解析度(geometry):例如 640×480, 800×600, 1024×768 等,預設為 1024×768。
– 像素深度(depth):例如 8, 16, 24 等,這是指每個像素可顯示的位元數,預設為 16。
例如我們想設定 VNC 伺服器監聽 5902 這個埠號,當有用戶連線到 5902 後可開啟一個 640×480 BGR233 的畫面。
pi@raspberrypi:~$ vncserver :2 -geometry 640x480 -depth 8
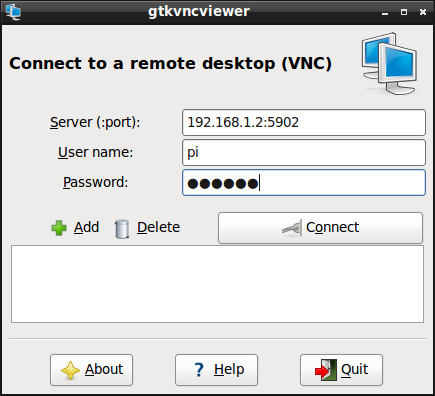
如果使用 gtkvncviewer 連線,需要輸入 IP、port 和密碼,使用者名稱可任意輸入。
sosorry@ubuntu:~$ gtkvncviewer
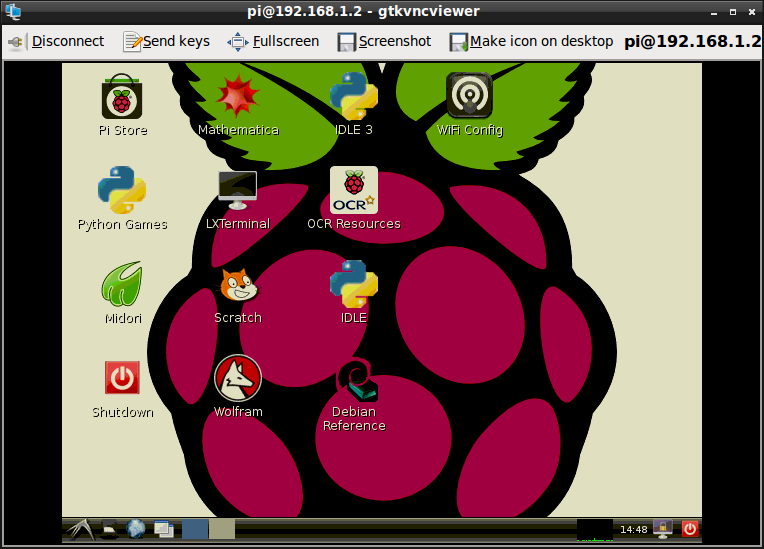
連線成功的畫面。
常見問與答:
1. 如何修改 VNC 伺服器的連線密碼?
我們可以用 vncpasswd 這個指令改 VNC 的連線密碼。
Using password file /home/pi/.vnc/passwd
Password:
Verify:
Would you like to enter a view-only password (y/n)? n
2. 我忘了設定 VNC 伺服器聽哪一個 port 了?
我們可以用 netstat 這個指令來查看目前系統開啟的 port。
pi@raspberrypi:~$ netstat -nutlp
-n :列出數字形式的連線地址
-u :列出 UDP 的連線
-t :列出 TCP 的連線
-l :正在進行 Listen (監聽)的服務之網路狀態
-p :列出 PID 與 Program 的檔名
pi@raspberrypi:~$ netstat -nutlp
(Not all processes could be identified, non-owned process info
 will not be shown, you would have to be root to see it all.)
Active Internet connections (only servers)
Proto Recv-Q Send-Q Local Address           Foreign Address         State       PID/Program name
tcp        0      0 0.0.0.0:6002            0.0.0.0:*               LISTEN      2124/Xtightvnc
tcp        0      0 0.0.0.0:22              0.0.0.0:*               LISTEN      -
tcp        0      0 0.0.0.0:5902            0.0.0.0:*               LISTEN      2124/Xtightvnc
udp        0      0 0.0.0.0:22316           0.0.0.0:*                           -
udp        0      0 0.0.0.0:68              0.0.0.0:*                           -
udp        0      0 192.168.1.2:123         0.0.0.0:*                           -
udp        0      0 127.0.0.1:123           0.0.0.0:*                           -
udp        0      0 0.0.0.0:123             0.0.0.0:*                           -
我們也可以用 ps 這個指令查看目前系統執行的程序中。
pi@raspberrypi:~$ ps aux | grep vnc
– a :不和終端機 (terminal) 有關的所有程序
– u :所有有效使用者 (effective user) 的程序
– x :與 a 這個參數一起使用可列出完整資訊
– | grep vnc 表示只列出有包含 vnc 關鍵字的程序
pi@raspberrypi:~$ ps aux | grep vnc
pi        2124  0.0  0.9   6532  3460 ?        S    14:36   0:03 Xtightvnc :2 -desktop X -auth /home/pi/.Xauthority -geometry 640x480 -depth 8 -rfbwait 120000 -rfbauth /home/pi/.vnc/passwd -rfbport 5902 -fp /usr/share/fonts/X11/misc/,/usr/share/fonts/X11/Type1/,/usr/share/fonts/X11/75dpi/,/usr/share/fonts/X11/100dpi/ -co /etc/X11/rgb
pi        2128  0.0  0.1   1760   508 ?        S    14:36   0:00 /bin/sh /home/pi/.vnc/xstartup
pi        2426  0.0  0.2   3548   800 pts/0    S+   15:44   0:00 grep --color=auto vnc
3. 如何在開機時就啟動 VNC 伺服器?
在 /etc/init.d/ 下建立一個控制的腳本 (script),例如取名為 tightvncserver
pi@raspberrypi:~$ sudo vim /etc/init.d/tightvncserver
內容如下,重要的是在 start) 部份設定啟動的參數。
#!/bin/bash
### BEGIN INIT INFO
# Provides:          tightvncserver
# Required-Start:    $syslog
# Required-Stop:     $syslog
# Default-Start:     2 3 4 5
# Default-Stop:      0 1 6
# Short-Description: vnc server
# Description:
### END INIT INFO

export USER='pi'

eval cd ~$USER

# Check the state of the command - this'll either be start or stop
case "$1" in
  start)
    # if it's start, then start vncserver using the details below
    su $USER -c '/usr/bin/vncserver :1 -geometry 800x600 -depth 16 -pixelformat rgb565'
    echo "Starting vncserver for $USER "
    ;;
  stop)
    # if it's stop, then just kill the process
    pkill Xtightvnc
    echo "vncserver stopped"
    ;;
  *)
    echo "Usage: /etc/init.d/tightvncserver {start|stop}"
    exit 1
    ;;
esac
exit 0
修改腳本權限。
pi@raspberrypi ~ $ sudo chmod 755 /etc/init.d/tightvncserver
將該腳本加入預設的啟動程序。
pi@raspberrypi ~ $ sudo update-rc.d tightvncserver defaults
執行結果如下。
update-rc.d: using dependency based boot sequencing
insserv: warning: script 'mathkernel' missing LSB tags and overrides
如果不喜歡這 warning,就順便修改一下 mathkernel 的腳本吧。
pi@raspberrypi ~ $ sudo vim /etc/init.d/mathkernel
根據 LSB 的規則將啟動資訊加到最前面。
### BEGIN INIT INFO
# Provides:          mathkernel
# Required-Start:    $local_fs
# Required-Stop:     $local_fs
# Default-Start:     2 3 4 5
# Default-Stop:      0 1 6
# Short-Description: mathkernel
### END INIT INFO
重新啟動 Pi,再執行 netstat -nutlp 或是 ps aux | grep vnc,可以看到 VNC 伺服器已經跑起來了,我們就可以 以 VNC 和 Raspberry Pi 連線。
發佈留言